 Today we saw the launch of the Google Nexus S, and before it even had a moment to breathe, the folks over at iFixit have torn one down to bits. While most of what can be found inside isn’t much of a surprise, there are a few interesting tidbits unearthed in the teardown – like the curved display and just what it means. Otherwise, it’s pretty standard fare since we’ve seen the plasticky Galaxy S devices torn down, so let’s see what iFixit had to say about pulling this baby apart.
The overall disassembling process for the Nexus S was ranked a 7 out of 10 in terms of easiness – 10 being very easy. Perhaps the only difficult part was removing the front panel which is attached with an adhesive. In order to remove it, a heat gun was applied to make it easier.
The curved display also turns out to be curved glass fused to the flat display. This means that the Nexus S’ Super AMOLED display itself isn’t curved, which would have been pretty difficult to imagine anyway.
Here are the key points to know if you’re thinking of a little DIY repair yourself (and as always, be sure to exercise a little caution before voiding your warranty):
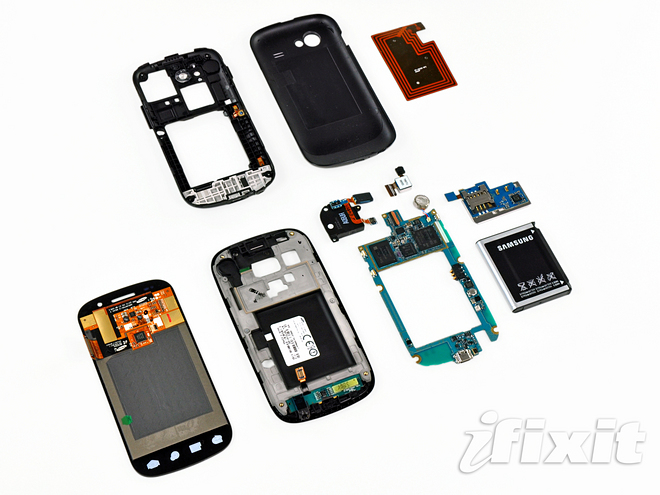
- Battery is very easily replaceable — just remove the back cover to swap it out.
- The motherboard comes out easily once you’re inside, as it’s held in place by regular screws and connectors.
- A lot of the phone’s components are modular, meaning that they’re simpler to replace, but will cost more as replacement parts.
- Front panel is attached with adhesive instead of screws, so it’s harder to take off than on the iPhone.
- If you shatter the front panel glass, the LCD has to be replaced as well — they’re fused together.
To see more images of the Nexus S tear down, click the link below.
[Via: iFixit]